Let's develop C language on Windows 10! Development environment setup summary
So far, I've shown you how to set up an environment for C language development on Windows 10 nine times. I'm going to give you some basic information about what tools you need and why. In reality, the work that has been covered so far is done at once. Therefore, this time I will summarize how to set up the development environment once so that it will be easier to work when reading it back later. I would appreciate it if you could use it as a reference when working.
Install Winget
Prepare Winget (Windows Package Manager) to set up the development environment. It is expected to be available by default in the future, but at the time of writing this article requires manual setup.
Install the "App Installer" from the Microsoft Store.
Download the latest version from Winget (Windows Package Manager) on GitHub.com and install it.
Make sure you can run the command winget.
Installation and setup of development software
Use the following software for C language development.
Install the software with the following command.

winget install "Windows Terminal"winget install PowerShellwinget install "Visual Studio Build Tools 2019"winget install Python.Python.3winget install LLVMwinget install "Visual Studio Code"winget install Git.GitPackage names (IDs) often change. If you cannot install using the above method, use the "winget search keyword" to find the target package name (ID) and install it.
With this method, Visual Studio Build Tools 2019 only installs the installer. Install the actual development for development by operating as follows.
Add the LLVM binary path to the PATH environment variable to make the compiler available.
In the same way as above, add the Git binary path (C: \ Program Files \ Git \ bin) to the environment variable PATH so that you can use the git command.
Start Visual Studio Code and install "Code LLDB Extension". Set the following files for each project as configuration files for build and debug.
For build --tasks.json
{ "version": "2.0.0", "tasks": [{"label": "Clang","type": "process","command": "clang.exe","args": [ "-g", "${file}", "-o", "${fileDirname}/${fileBasenameNoExtension}.exe"],"problemMatcher": [],"group": { "kind": "build", "isDefault": true}} ]}For debugging --launch.json
{ "version": "0.2.0", "configurations": [{"type": "lldb","request": "launch","name": "Debug","program": "${workspaceFolder}/${fileBasenameNoExtension}.exe","args": [],"cwd": "${workspaceFolder}"} ]}Make sure you can build and debug C source code files with Visual Studio Code.
Setting up GitHub.com and Git
Create a "GitHub" account.
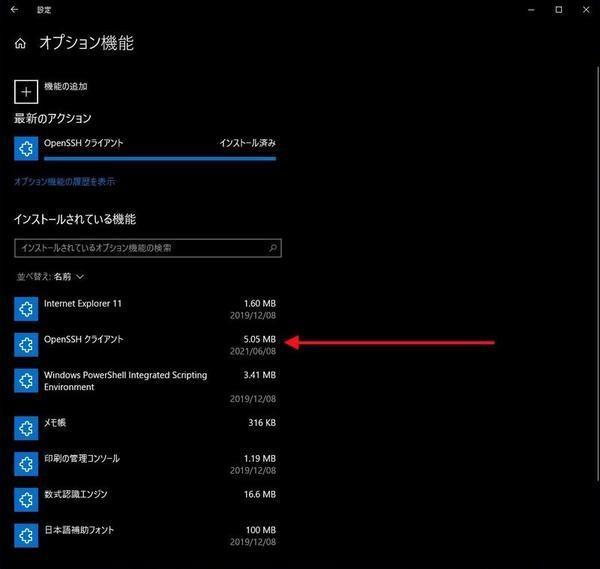
Enable OpenSSH on Windows 10.
After installing OpenSSH, use the ssh-keygen command to generate an authentication key (public / private key) without a passphrase. If you already have an authentication key, you do not need to generate it.
Generate authentication key (public key / private key)
ssh-keygen.exeAdd the public key to GitHub.com from the generated authentication keys (sign in to GitHub.com and select "Settings"-> "SSH and GPG keys"-> "New SSH key" from the menu. Enter it, paste the public key into Key, and then press "Add SSH key").
Run the git command to set the username and email address to use GitHub.com.
Set up a username and email address to use GitHub.com
git config --global user.email "メールアドレス"git config --global user.name "ユーザー名"Make sure that you can clone the repository registered on GitHub.com with the git command.
| command | Contents |
|---|---|
| git clone repository name | Clone repository |
| git pull repository name | Update repository |
| git add file | Specify to treat files as targets for adding or changing changes to the repository in the next push |
| git commit -m'message' | Set commit message |
| git push | Push to repository |
Organize how to set up the development environment
Developer PCs tend to be cumbersome. As I install and uninstall multiple tools and change settings, I don't know which state is up to date. In order to be able to reproduce the development environment, it is good to organize the initial setup method and the changes made after that. That's why you can write down the setup instructions on GitHub.com.
When it comes to collaborative development, it will be necessary to reproduce the development environment among the members. Documenting the setup method like this makes it easier to share information.